Sale Request - Card
You should now have a good feel for the Sale Request object as it relates to handling cash payments. Now let's look at card payments. Card payments can be processed by an mPOS terminal if the terminal is paired and connected to the user's mobile device.
The User Interface
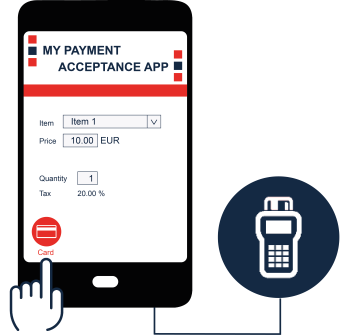
Let's revisit our UI again. The user hand in the picture below emphasizes that we are now going to focus on card payments, which require that a terminal be connected and paired to the mobile device of the user.
The same sample Item 1 which costs 10 € is again used in the sample code. So there are actually only a few differences between this code and the cash code in the previous chapter.
Code Differences with Credit Sale Request
The key differences between the cash code and the credit code presented in this topic are:
- Terminal Manager is used to discover Devices and the results are placed into:
- an array of terminals in the iOS code
- a terminalDevice object in the Android code.
- The add card payment method is used instead of the add cash payment method. The add card payment method uses the discovered terminal.
That's it. The rest of the code is almost exactly the same as the cash code, so it should look quite familiar. Let's now examine the two object models.
The iOS Object Model
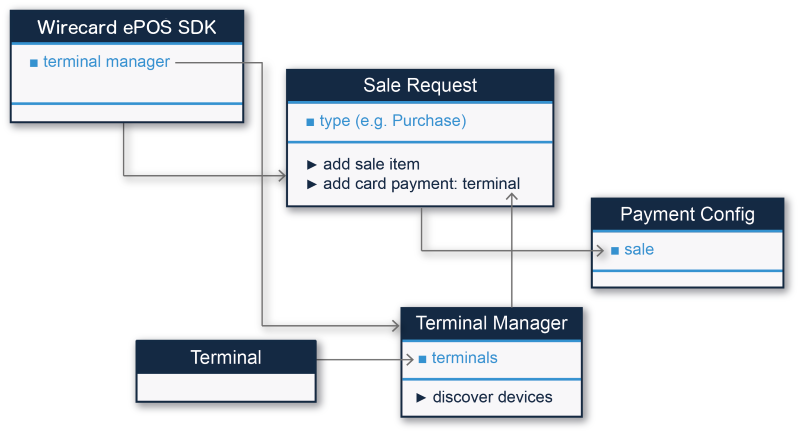
An expanded version of the iOS object model is shown below. It now shows the add card payment method and the Terminal Manager component and illustrates how they collaborate together.
Tip
If you are a little overwhelmed at this point, don't worry about it. The Payment Flow chapter provides a good review which covers card and cash payments on iOS a second time.
Info
When adding a payment method (addCashPayment, addCardPayment, etc.), you can optionally include a notification callback URL in your payment request (notifyUrl). This URL will then be called once the payment is completed, if you chose to set it.
The Android Object Model
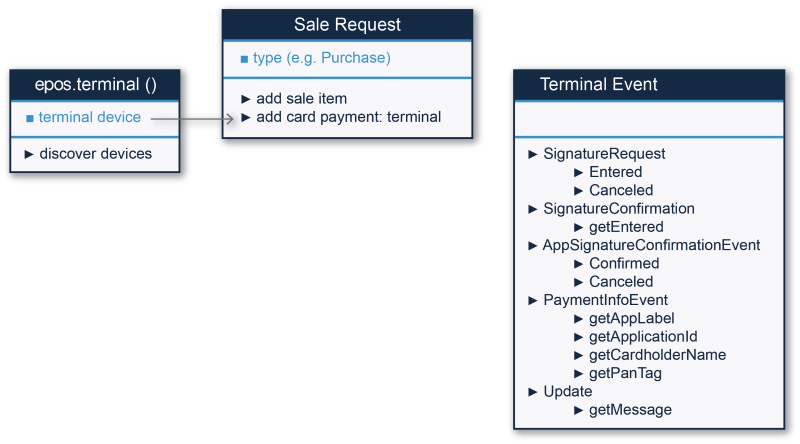
The Android sample code is structured somewhat differently from the iOS code. The device discovery, sample sale request building and adding of a card payment are similar, but after that, the eventRelay takes over and handles various events that can take place on the terminal, such as Signature Request, Signature Confirmation and so forth.
Note
Signature Request and Signature Confirmation on iOS are covered in the Payment Flow chapter. In addition, a sample UI for handling these user actions is presented in that chapter.
The Sample Code